Firstly, lighting is crucial to a successful green screen film. Crucial. I truly cannot emphasize enough that an inexperienced lighting technician looking to experiment should not be taking risks with the lighting on a green screen set! While
using green screen, a 5 point light set up is ideal. You will need to
have enough light to light up the backdrop completely, as well as the character. If there is not enough light on the backdrop, shadows or
hot spots will appear, which are difficult to key out during the
editing process. If your character is not lit well enough, they will
actually start to disappear into the background once the editor begins keying, because
there is not enough definition between the character and the
green screen.
While
working with a green screen, to be safe, it advisable to aim to have a 5 point light set
up if possible, in order to get the most “key-friendly” footage. In post
production, poorly lit green screen could lead to your actor
disappearing into the background, the foreground being grainy or
under-exposed, and being faced with a giant shadow that just won’t
key out. I have learned from experience that disappearing characters and obnoxious shadows can turn a once peaceful human being into the Incredible Hulk, cursing obscenities at Final Cut Pro before running screaming into the night to find that "(expletive) lighting technician".
The
most basic way to appropriately use this 5 point lighting system is
to keep the key, fill, and backlight in relatively the same position
as you would have them in a 3 point lighting set up. With the key
being the brightest light, position it at about a 45 degree angle
from the camera, facing the character. The fill should be on the
opposite side, at a lower intensity, and still at that 45 degree
angle from the camera. The backlight can be positioned behind and
slightly to one side of the character, so it frames the subject and
is out of the camera’s view. The other two lights you can use to
light the backdrop. Placing one on either side, but letting the beams
cross each other so that the light seems to just flood the
background.
If you have a character that is lit perfectly with 3 lights, then a three
point lighting system may be all that is required. However, the more
characters in the shot, the more lights needed. That is basic green screen algebra - More Characters = more lights. The wider the shot,
the more light needed. If you decide to create any sort of mood lighting,
or emphasize certain props or aspects in the shot, the more lights you
shall need.
| Notice how "LIGHTS" comes first... |
Three
point lighting is a technique used in various forms of media. Used in
film, photography and even CGI imagery, this technique has become a
standard practice in many sections of media production. The name
"three point lighting" comes from the fact that while using
this technique, the media maker will place three seperate lights in
three seperate positions, in relation to the character being filmed
or photographed. This means that the character on screen can be
illuminated, however desired. It also means that the shadows within
the shot can be controlled by placing the lights in the appropriate
direction.
Out
of the three lights used in this technique, the key light is usually
the most important light that a cinematographer will use during this
lighting set up. There are different ways to optimize the use of a
key light, but while using three point lighting, it is positioned at
a 30–60° angle, the beam directly reaching the character being
filmed, and acts as the main source of light for the shot. The key
light dictates the lighting design, which we will keep in mind during
filming, as we will need to take into account the strength, angle and
colour of this light as it effects the entire aesthetic of the shot. You want the key light to illuminate the actor in a way that
eliminates shadow and works well with the other two lights to create
even lighting, a crucial element in a successful green screen
production. Which I am quite sure I have mentioned.
 |
| When God said "Let there be light"...he meant for green screen. |
The fill light in the three point lighting system, is used for the purpose of decreasing the contrast of the scene, and to decrease the strength of the shadows within the frame. The fill light is usually softer than the key light, but the ratio between light and shadow depends on the intent the film maker has for the scene. It is placed at a side angle to the key light, often below it, at the level of the subject's face - this will be important to master for your green screen so that you can illuminate the subject appropriately in order to make them correspond with the back plate.
The
last light included in three point lighting, is the back light. This
is placed behind the character, again, to correspond with the image
on the back plate (for instance, if it is a cold, blue light, we will
use an appropriate filter on the back light to give this
impression).
It is a common misconception that when using green screen, to get the best result it is wise to shine as much light at the green fabric. This is certainly not the case - the most important part of getting a successful green screen shot, is how the subject in front of the green screen is lit, and how consistent that light is with the back plate. The film, Sin City, is an excellent example of how to use lighting when using chroma key. And a good film to boot.
It is a common misconception that when using green screen, to get the best result it is wise to shine as much light at the green fabric. This is certainly not the case - the most important part of getting a successful green screen shot, is how the subject in front of the green screen is lit, and how consistent that light is with the back plate. The film, Sin City, is an excellent example of how to use lighting when using chroma key. And a good film to boot.
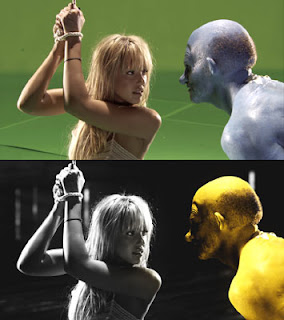 |
| A good use of green screen. |
When
using green screen it is very important to check what lights or light
sources are present in the image that are scheduled to be placed upon
the back plate in post-production. Far away lights in shot, (for
example, lamp posts if the character is meant to be walking down the
street at night), will give the scene a hard back light, whereas
nearer lights such as a lamp post the character is standing under,
will illuminate the character more rather than the back ground. All
light sources in the image to be placed around the character using
green screen must be taken into consideration in order to provide
consistent lighting for the shot in the studio.
A
good way to understand how the lighting is going to be effecting the
subject in question, is to have a member of the crew hold their fist
in the air, (have someone put Van Halen on to pump your fist to if you feel silly doing it in silence) while blocking out light with the other where the
character shall be standing. This blocks off one light in order to
see how the light from all the other angles are effecting it. Once
the shots have been decided, and how the subject is going to interact
with the background, it is important to ensure that the subject
being filmed does not go off the edge of the green screen. Remember - if the subject goes off the edge of the screen, the editor will go over the edge in post production. And we love our long suffering editors.
Once
the lights have been set up and switched on, it is advisable to take
photographs of a subject in front of the back plate, run the photos
through photoshop and turn the contrast of the image down. This will
allow the crew to see any dark areas or hotspots that are in need of
correction in the set up, that may not be visible by eye. This saved us a lot of time and stress when I insisted on doing this to my crew for our first green screen project.
If you do not have a lot of distance in the studio, some lamps may be too
big for your production, the beam too powerful. Especially if you are media students, trying to keep the rest of the class at bay as everyone is waiting their turn to use the studio due to booking the studio at the very last minute. I understand, there were parties I simply couldn't miss out on either. When I was a student, we were very
limited to the kinds of lights we had access to, but there are ways
around this if the lights we booked proved to be too powerful.
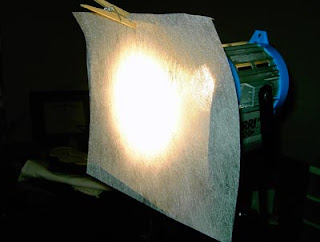 |
| Tough Spuns: WORTH GOOGLING. |
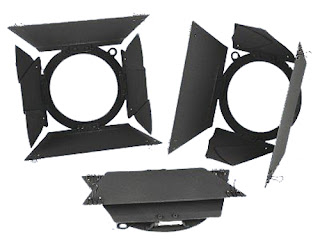
Tough
spuns for example are not that expensive, are fire proof and brings
the level of the beam down when placed with the lamp. Tough spuns
come in degrees of transparency, from full to 1/4. Although we may be
using powerful lights they are not only adjustable, but if they still
prove to be powerful, we can always put filters on to accommodate the
shot we want. Believe me, if you are making a green screen film, tough spuns are certainly worth Googling and may earn you several drinks from your crew when they save the lighting for your project.
Once
the green screen has been appropriately lit, it will be possible to
appropriately light a subject. The background plate will have to be
taken heavily into consideration, and lights close to the subject
will have to be placed roughly at the same height and distance from
the subject as they would on the back plate.
If you will shoot your own
footage for the back plate, you will need to take photos and footage
of the location, in order to get consistent lighting. If you plan to
use a template that is not your own, you will have more freedom to
experiment with the lighting - however, common sense about where the
light would be coming from in the image is vital. You could not, for
example, have light obviously and intrusively beaming up from the
floor if your subject is walking on a woodland path. Unless the plot involves a frolicking Dorothy Gale on the beaming yellow brick road. And even then you would be lucky to justify light beaming from the very floor.
The
colour of the lighting is also important to take notice of when
observing the image due to be placed over the green screen. For
example, if the subject is meant to be walking on a modern pier at
night, while there may be lighting in the form of lampposts, it will
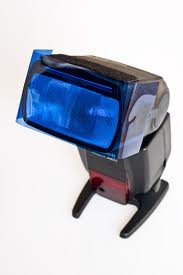
need to be a cool light, so a CTB (colour temperature blue) gel may
be placed over the light, in order to create the appropriate back
light for the head and shoulders of the subject, while mimicking the
lights that would be present on the pier.
.jpg) |
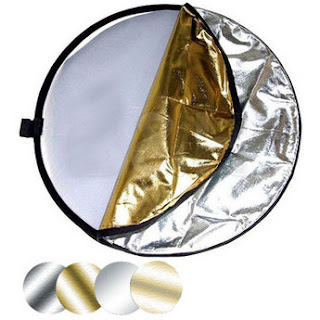
| Light Reflector: A media student savior. |
Another tool that is useful
when working with green screen is a reflector. It is used to even out
harsh shadows and give fill to the subject where needed.
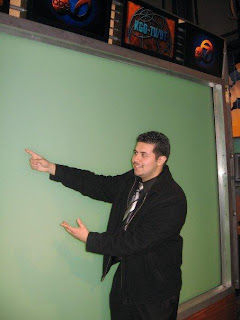 |
| ...I hope to God I'm pointing at England. |
Although
lighting is paramount (as you have probably guessed from this blog....) to the success of a green screen production,
there are other things to take into consideration, such as how
convincing it is that the subject is indeed at the location fitted
over the green screen.
Youtube is full of clips making fun of the terrible use of chroma key in the 70's and 80's, where a weather man would perhaps point to Scotland and cheerily chirp about how sunny England was going to be on Tuesday. Or unknowingly dipping his hand into the Atlantic Ocean when consoling Ireland about the rain they were due to receive at the weekend. That is not how you want your project to be remembered, graded or reviewed.
Tips to avoid embarrassment of this nature: If the location is windy, a fan may could used to
create the effect of wind blowing through a subject. If the shot
includes rain, it may be wise to put droplets of water on the
subject's costume and hair (you will of course have to be careful if
this is the case, being surrounded by so much electricity in a
studio!). If there is action in the background, it may be worth
experimenting with crew members waving their hands past the lights to
correspond with the background.
Because I understand how frustrating chroma key can be to work with, I have some further short tips for you young film makers out there:
. Make sure a storyboard is in place so
that the entire group knows what the aim of the project is, and what
the background is supposed to look like.
. Use a shallow depth of field in order
to control light spill.
. Avoid the characters on set having
green clothes while working with green screen. Or blue clothing when working on blue screen...I am sure you can see where I am going with this.
. In regards to props, avoid shiny
ones. Shiny props might reflect the green of the screens and give the
characters a sickly look and the set a sickly hue.
. You cannot fix the lighting in post
production when working with green screen, this is NOT the project
for inexperienced lighting technicians to experiment and gain more
experience! The light must be even and bright on every portion of the
green screen material.
. The actual green screen itself must
be taut and unwrinkled, in order to get the best possible results. If
there are imperfections on the screen itself they will show up on the
footage.
. Never place your subject right next
to the screen. Move your subject as far away from the screen as
possible.
Green Screen users of the future: I wish you luck and truly hope my article helped!
Adieu.
Louise.


No comments:
Post a Comment